
The Image Organization is an application designed to help you effortlessly organize your photo and video collection into folders based on specific date formats. This application allows you to automatically categorize your image and video files into year, year-month, and year-month-day formats, enabling you to sort thousands of files within minutes. Additionally, besides automatic categorization, it allows you to quickly separate your photo files into categories of your choice using the manual page. Another feature of the program is its ability to locate and categorize image and video files no matter how deeply buried or scattered they are. By selecting the “include subfolders” option in automatic categorization, the application will effortlessly find and retrieve these files for you.
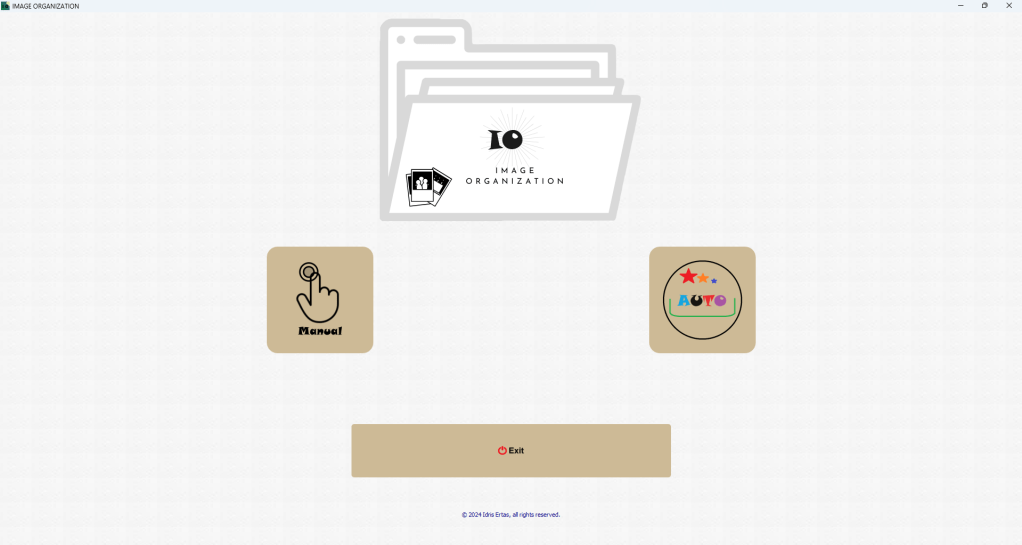
Home Page Options:
When you launch the app, you are presented with two main options: “Manual” and “Automatic”. The “Manual” option allows you to create buttons under each photo with category names that you specify. You can then categorize photos by clicking the corresponding buttons. The “Automatic” option, on the other hand, sorts photos automatically based on a specified date format and places them into the appropriate folders.
Automatic Categorization Page:
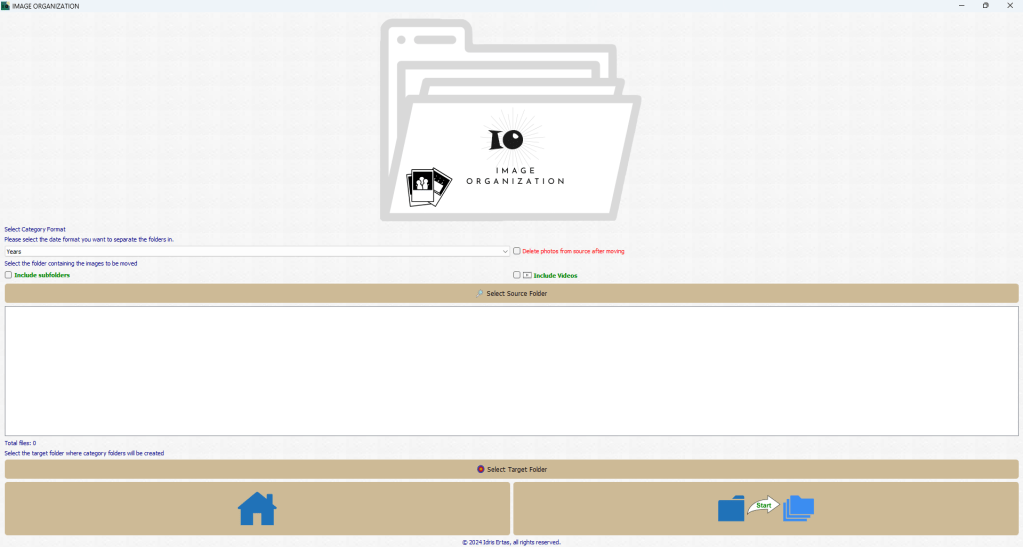
The Automatic Categorization Page allows you to automatically place your photos and videos into folders based on a specific date format. With its user-friendly interface, you can select source and destination folders, list files, and take the necessary steps to organize them.
Features:
- User-Friendly Interface: Provides an easy and intuitive interface.
- Source and Destination Folder Selection: You can choose the source folder where your photos and videos are located and the destination folder where categorized folders will be placed.
- File Listing: Lists files in the selected folder.
- Date Format Selection: Allows you to choose the date format for organizing photos and videos into folders.
- Include Subfolders Option: You can choose whether to include subfolders in the categorization process.
- Categorization Process: Organizes photos and videos into folders based on the selected date format.
- Separate Folders for Photos and Videos: Creates two main folders named “Images” and “Videos” in the destination folder, under which the categorized files will be placed.
Usage:
- Source and Destination Folder Selection:
- Use the “Select Source Folder” and “Select Target Folder” buttons to choose the source and destination folders, respectively.
- If you want to include subfolders, check the corresponding checkbox.
- Date Format Selection:
- Select the desired date format for organizing photos and videos from the “Select Category Format” dropdown menu.
- File Listing:
- When the source folder is selected using the “Select Source Folder” button, files are automatically listed.
- Categorization Process:
- Check the “Include Videos” option if you want to categorize videos as well as photos.
- Click the “Start” button to organize thousands of photos and videos into folders based on the selected date format within minutes.
- Photos without photo shooting date information are moved to the “unknown” folder, and videos without date information are similarly handled.
- Return to Main Page:
- Click the “Home” button to return to the main page.
Organize your photo and video collection based on a specific date format with the Automatic Categorization Page!
Organize your photo collection based on a specific date format with the Automatic Categorization Page!

Manual Categorization:
The manual option offers flexibility, letting you organize photos according to your preferences. You can arrange and place photos into folders as you see fit. This option is ideal for users who want to create a specific order in their photo collection.
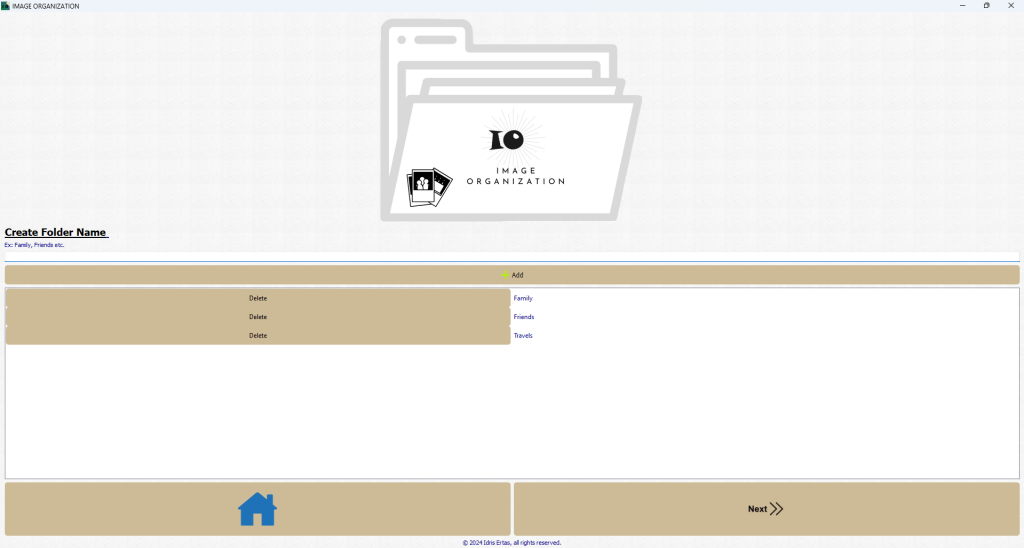
Category Selection Page:
- Starting the Module:
- When you launch the Category Selection Page, you will see a window with a header and an input field for adding category names.
- Adding a Category:
- Enter a category name in the input field labeled “Create Folder Name.”
- Press the Enter key or click the “Add” button to add the category to the list.
- Example category names could be “Family,” “Friends,” “Vacations,” etc.
- Category List:
- Your categories will appear in a scrollable list below the input field.
- Each category entry includes a “Delete” button to remove unwanted categories.
- Managing Categories:
- You can add up to 20 categories. If you try to add more, the application will display a warning message.
- The application will also warn you if the category name contains invalid characters or exceeds the maximum length of 250 characters.
- Navigation:
- To proceed to the next step, click the button with the forward icon.
- If you need to return to the main page, click the button with the home icon.
- Finalizing:
- Ensure that you have added at least one category before moving to the next step. The application will prompt you if no categories are added.
This intuitive process ensures that your photo collection is neatly categorized and easy to manage, making it simpler to locate specific photos in the future.
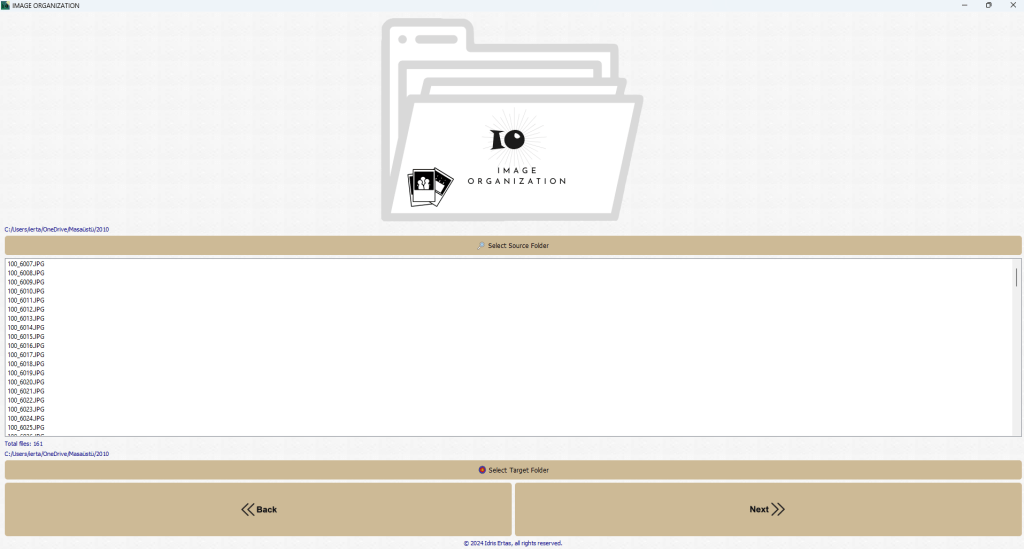
Folder Selection Page:
- Launching the Module:
- When you start the Folder Selection Page, you will see a header and buttons for folder selection at the top.
- Selecting the Source Folder:
- Click the “Select Source Folder” button.
- In the file dialog that appears, select the folder containing your photos.
- After selection, the photos in the source folder will be listed, and the total file count will be displayed.
- Selecting the Target Folder:
- Click the “Select Target Folder” button.
- In the file dialog that appears, select the folder where categorized photos will be moved.
- File Listing:
- The supported photo format files in the selected source folder will be listed.
- Navigation:
- Click the forward arrow button to proceed to the next step.
- Click the back arrow button to return to the previous page.
Photo Transport Page:
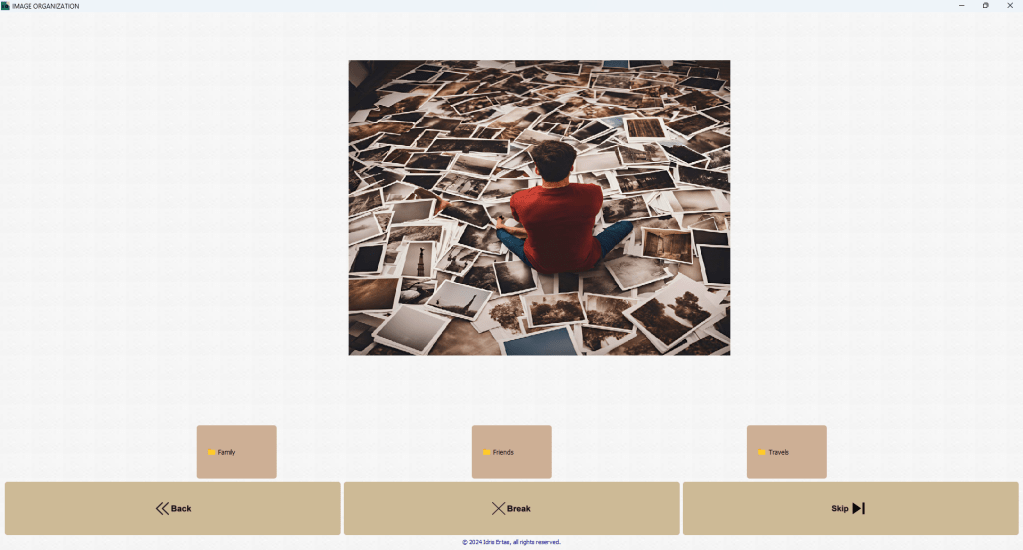
- Starting the Module:
- When you start the Photo Transport Page, you’ll see the photo display area at the top and category buttons at the bottom.
- Photo Display:
- Photos loaded from the source folder will be displayed one by one.
- Category Selection:
- Click on the appropriate category button to move each photo to the relevant category.
- Skipping Photos:
- If you want to skip a photo, click the “Skip” button.
- Completing the Photo Moving Process:
- Click the “Finish” button to check if all photos have been moved. If not all photos are moved, you will receive a warning.
- Returning to the Previous Page:
- Click the “Back” button to return to the previous page.

I need a program just like this. With its simple interface and ease of use, I will finally be able to categorize the pictures on my computer that I’ve been afraid to look at for years. Thank you
BeğenLiked by 1 kişi
Thank you for your kind thoughts.
BeğenBeğen
Güzel ve kullanışlı bir uygulama. 👍
BeğenLiked by 1 kişi
Tesekkurler
BeğenBeğen